Progressive Rock Artist seeks Audience

Category: Equipment (Page 2 of 10)

Under Pressure

Following on from a previous post, I wasn’t happy with the touch response on the Korg M1 since upgrading the keybed felt. The Yamaha FS keybed supports “aftertouch” or “channel pressure” which means that you can alter a sound by pressing down after the initial depression of the key. Nice for, say, opening the filter or adding vibrato, or some other musical change in the sound.

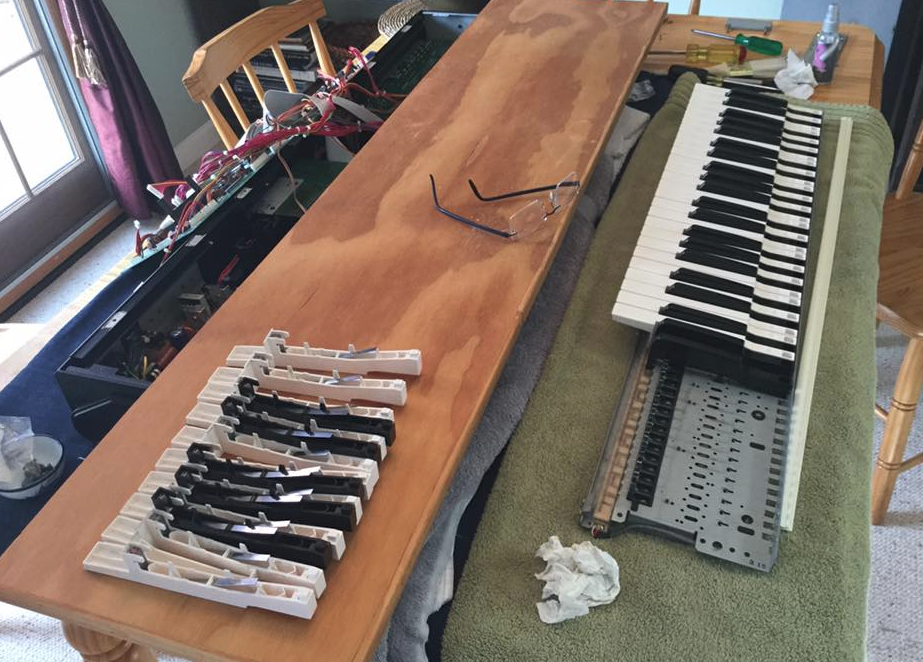
After the felt upgrade, the “feel” was great, but the response to additional pressure on the keys didn’t seem smooth or playable.

Fortunately, the Korg M1 has two tiny variable resistors you can tweak to fine-tune the pressure response. The down side? They are inside the chassis and you can’t get at them without turning the unit upside down, and removing the bottom panel. At which point, playing the instrument to check the results of the adjustment is problematic.

Remove all the screws except the ones holding the rubber feet

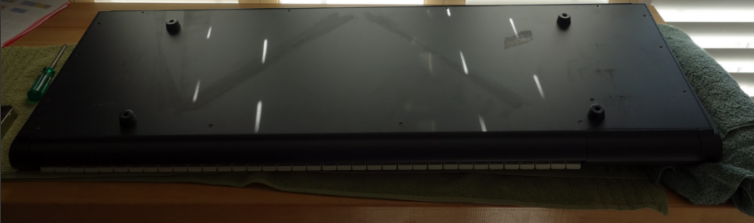
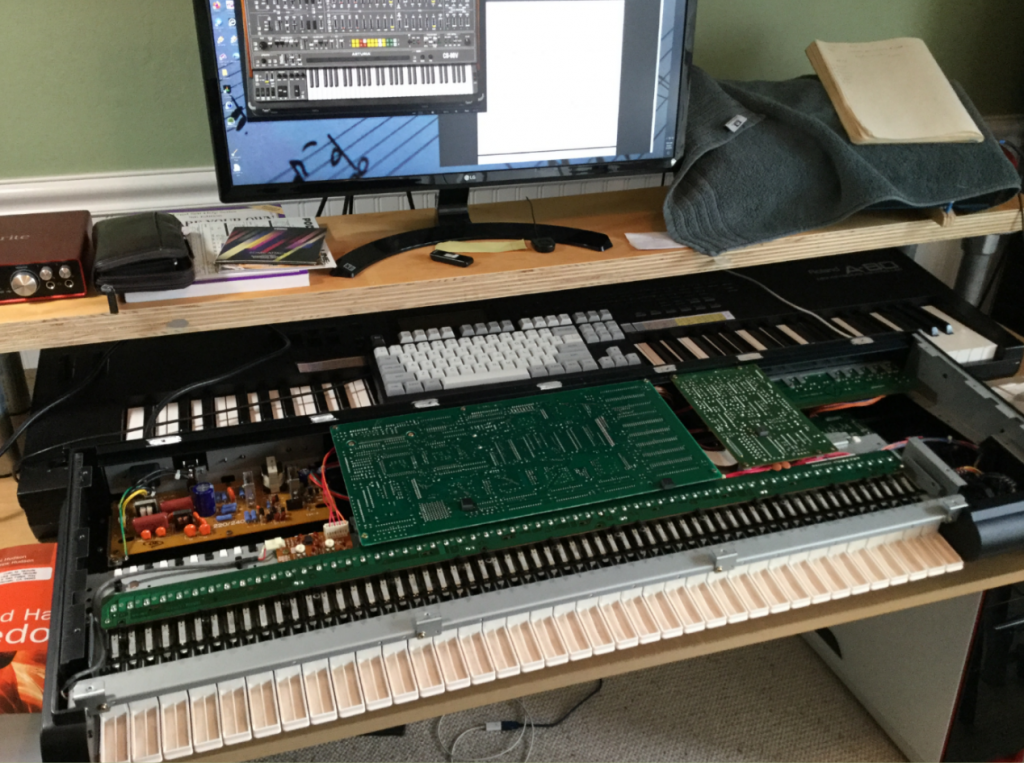
After removing the bottom plate and taking a look, the pressure adjustment controls are very easy to spot:

Right in the middle of the photo

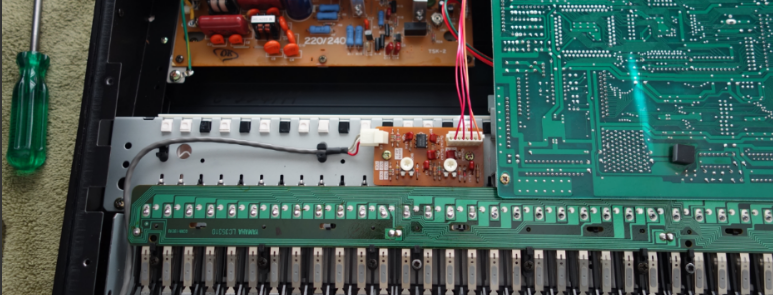
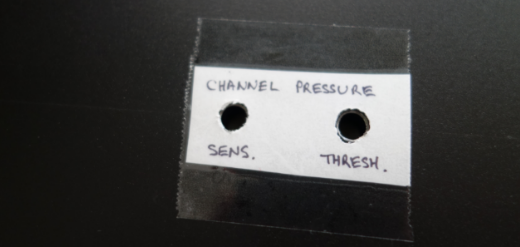
Each control sets a different aspect of pressure sensitivity:

  • The one on the right sets the level required to start sending “channel pressure” signals.
  • The one of the left sets the level required to reach “maximum”.

Obviously these levels are very subjective and need to be tuned to match your playing expectations, along with how firm the newly installed felt is. And over time, these may change – the felt will break down and become softer; and your technique as a performer may also change.

I decided I’d quite like to make it easier to access these adjustment controls with the keyboard assembled and set up for performance, so I measured the location and drilled a couple of holes in the under plate.

The location of the centers of the holes are 176 mm down from the top edge of the back plate, and 198mm and 226mm in from the left edge, respectively.

6mm holes

With the back plate screwed back into position, and the keyboard restored in the upright position in the stand, I plugged it in and temporarily edited the default I08 “Pan Flute” patch so that the AFTERTOUCH Pitch=+12, for calibration purposes. This means that “maximum pressure” should raise the tone by one octave.

I then used a Philips head screwdriver to reach under the chassis and adjust the levels to their mid-point. Pressing a key and listening to the onset of the change in pitch, and how heavy I needed to push in order to raise the pitch, allowed me to adjust each of the two levels to optimize the response of the keyboard to pressure.

Refurb FX Unit

I’m not a hoarder – at least, I try not to be – but there are some items of equipment I’m not using and probably don’t need to keep. They are either in storage, or mounted in a rack, taking up space but providing passive heat sinking.

One of these items is my venerable Digitech GSP21-Pro. This is a very capable guitar effect processor and I think it could go to someone who would actually use it rather than just leave it sitting around. I brought this over from New Zealand, so it required a 240V mains supply. About 50% of my gear has been running on a grunty 120-240 mains transformer, so I’ve never bothered to take a close look at the power supply on this unit. However, if I am to pass this on to someone else, it will really need to run on a 120V supply.

Given my recent success with my Korg EX-8000 , I figured I’d open it up and see what was needed to convert the power supply. It turns out that it couldn’t be simpler:

The internal transformer supports 100-240 volts via a simple fuse plug

The easily switched voltage plus the standard appliance socket means that it was trivial to switch it over to 120V. Embarrassing! I could have done this years ago and not needed to run it on the big transformer.

However, I did have a problem: The GSP21 had forgotten all of the custom programs I’d set up over the years, and when turned on, goes to patch 01 instead of the last used setting. Typically this behavior is due to the internal memory backup battery being dead. If I was to sell or gift the unit to someone else, I wanted to be confident that their own patches would be retained in memory while the unit was switched off.

The internals are easily accessed by removing a series of screws from the chassis. The backup battery is identified quickly, tucked away neatly at one side of the PCB. I expected a coin-style CR-2032 but it’s quite different:

Energizer No. 523 4.5 Volts

That battery lasted at least 20 years before giving up. Impressive.

After some research I found that it is actually very difficult to find a No.523 battery of this type. One possible replacement is A21/A133 4.5 Volt Alkaline Battery which can be found at BatteryMart.com under the item code BAT-A21PX.

Mind the gap…

It is almost a perfect drop-in replacement except for a 1mm gap. I tried bending the battery socket arms inward to eliminate the gap but it wasn’t really possible without potentially stressing the PCB. It’s not really designed to be bent – it’s quite strong spring-steel.

My solution was to use a paper clip. Really low-tech but seems to work well:

Simple but effective

It closed the circuit and the battery is firmly held in place. Turning on the unit for the first time showed “restoring factory patches….” for a second, before making patch 01 available. The second time I powered it up, the patches were available immediately, and it remembered which patch I had selected prior to turning the unit off. Success!

I cleaned the exterior of the unit, and offered it on NextDoor.com along with cables, the footpedal unit, and a ragged photocopy of the user manual (which is all I had). And now it is in someone else’s hands, hopefully to give many more years of effective use. I highly recommend the UltraVerb reverb algorithm; it’s very good.

A Refurb’d Reverb.

New Felt for an old Keybed

The KORG M1 synthesizer uses a well-respected keybed manufactured by Yamaha. It’s solidly built and comes apart “easily” for maintenance. I’m replacing some felt strips and adding a few more for mechanical noise suppression, but it turns out that in order to do that, you really do need to remove the keys. While I’m at it, a clean and re-grease is in order.

Walter Nicholls, I’ve found quite a lot of your hair, if you want it back.

Also, a shout-out to BustedGear.com for the excellent support on fixing dodgy key contacts.

Adjusting the pressure response (trim pots)

Also, this is a good reference for adjusting the aftertouch/pressure response.

Guitar Amplifier Simulators – Introduction

The “Producer” tier of Cakewalk’s SONAR has included bundled 3rd party plugins over the years. Some of these were “limited” editions, and some were full products. It’s had some kind of amplifier simulator plugin ever since version 8, I think it was Guitar Rig 3 LE (limited edition).

Most recently prior to Cakewalk’s BandLab acquisition, it included a special “Cakewalk edition” of Overloud’s TH3. Now that Cakewalk (formerly known as “SONAR”) is distributed at no charge by Bandlab, it does not include any bundled 3rd party plugins.

At some point I installed IK Multimedia’s AmpliTube 3 which could be downloaded for free back in 2011. (It’s now at version 4.)

Since then I must have taken advantage of one of the periodic bargain upgrade prices for Guitar Rig, because on my DAW, the full version 4.0 was installed. This week I upgraded Guitar Rig to version 5.

These are all good products, but I haven’t really explored them in detail because I tend to use hardware FX for guitar and bass recording, specifically the Line6 POD 2.0, with which I’ve always obtained good results.

But creativity is fostered through experimentation and playing around, which brings me to this month, in which I re-wired my bass in stereo, and started playing around with amp simulator plugins. Specifically, parallel effect chains for the stereo bass signal.

I got interesting results with the time-limited demo of the full version of TH3, but the Cakewalk edition that I have installed is too feature-limited. The full version TH3 is no longer supported, and it costs more money than I’m comfortable with to get to the current offering, TH-U.

I’ve had more luck with Guitar Rig 4, partly because it is a “full” product. When I checked the Native Instruments web site, I saw I could upgrade to the latest version 5 at a very nice price, so I did – even though it hasn’t been updated since 2011.

Guitar Rig (like its brethren) provides a container in which you can build a series of virtual effect units and amplifiers and speaker cabinets into a customized signal chain. This is pretty cool, but it does lack the interactivity of a physical pedalboard, unless you pair the software up with a special hardware controller, such as the Rig Kontrol:

image 

This physical pedalboard plugs into your computer via MIDI or USB and can talk to the virtual effect rack. You can enable or disable effects in the chain, or manipulate volume or wah pedals.

Unfortunately, it is no longer supported, although you can find them on ebay, reverb, etc.

On the plus side, if you have a MIDI controller in your studio (such as a keyboard with an expression pedal) then you can use that instead. Which is what I’ll write about next.

« Older posts Newer posts »

© 2024 The Prodigal Sounds

Theme by Anders NorenUp ↑