Consider an audio track, in which we want to change the volume of the audio for a short period of time during playback. Instead of moving the Track Fader manually with our mouse, we can set up an automation envelope on our track to do this for us.
Creating an automation envelope
Click on the Edit Filter menu and select Automation > Volume from the drop-down list:

Now we can add nodes to the envelope and arrange them so that the volume is adjusted the way we want. In this example, we’re going to lower the second half of the clip by 6 db:
You’ll notice that the Track Volume control changes to show an envelope symbol, indicating that the value is controlled by an envelope, and will change its value over the timeline:

So far, so good. You may notice that if you try to change the Volume value during playback, it will snap back to the value dictated by the envelope. This is expected behavior.

The default volume of the track is -6 db (as shown by the meter) but as the envelope curve takes effect, it applies a change from 0 to -6 and the output is now -12 db.
By default, this is how Cakewalk displays Track parameters controlled by automation envelopes. This is “Envelope Mode”.
Introducing Offset Mode
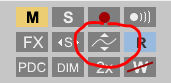
Alternatively, we can switch to “Offset Mode” by using the switch in the Control Bar Mix Module:
In Envelope Mode, volume and pan faders follow the project’s automation and do not respond to changes you make in real-time.
In Offset Mode, you “offset” the current automation in a track using a parameter’s controls.
Cakewalk Manual
Switching to Offset Mode changes the Volume control “envelope” symbol to a plus sign, but other than that, there is no change:

Now, say we want to adjust the overall level of the track, but retain the envelope shape. We can just make the change. For example, in Fig 6. we have looped playback over the clip, and I change the volume “offset” from 0 to -6, which lowers the envelope values by -6 over the whole timeline.

After we apply the manual adjustment, you can see from the audio meter that the output volume at the start of the clip is now at -12db. During playback, the envelope then applies the -6 reduction and the output has been lowered and is now -18 db during that segment of the timeline.
Tip: Switch back to Envelope Mode to avoid accidental changes
Because it is less easy to make accidental adjustments in Envelope Mode, it is a good idea to switch back to it, and only use Offset Mode when we need it. Back in Envelope Mode, the track now looks like this during playback:

Of course, using our ears and looking at the Track Meters, we can tell that the track audio is now playing back -6db quieter, which is what we intended.
Warning: Be aware of the invisible offset value
On the down-side, both the level of the envelope and the Volume control value are indicating that the level is being adjusted from 0 to -6db. But that isn’t strictly correct: there is an invisible additional offset of -6db, that we applied in Offset Mode, but now isn’t visually displayed (except in the audio meter).
So you should be aware of this possible source of confusion, and, when in doubt, you can temporarily switch from Envelope to Offset mode to check for any manually-applied offsets.
Bonus Tip: easy gradual envelope changes
A quick way to get a gradual change in the envelope instead of the instant change shown above, try this: Place two nodes by clicking on the envelope; then select a wider region and Ctrl-Click-Drag down from above:
Finally, you may wish to return the Track display to the view shown in Fig 1., in which case, just set the Edit Filter back to “Clips” (see Fig.1).
Although I’ve used Volume as an example in this post, everything I’ve said also applies to Pan and other values controlled by automation. Have fun with automating parameters with envelopes in Cakewalk By Bandlab.
Leave a Reply